There are tons of great reasons to make your baby's food from scratch. It's cheaper (I was able to feed munckin almost 100% organically for less than it would cost me to buy regular ol' Gerber). It's healthier (canned baby food cooks out tons of the nutrients, just look at the colors, or lack thereof). It helps get your babies used to eating real foods with real tastes and textures and once you get the hang of it, it's actually super easy! Let's get started, I'm going to show you with carrots, but you can do almost any fruit/veggies, just make sure it's soft enough to be pureed. I also did chicken thighs this way. I just baked them and added a lot of water to the blender. I loved this website for tips on what and when and how to feed baby.
Step 1: Peel and cut your carrots (or other veggie) into roughly even sized chunks that won't take too terribly long to cook.
 Step 2: Bring a pot of water to a boil and throw in your veggies (I only used a few inches of water, so it's sort of a cross between steaming and boiling. The lost nutrients in the water will probably get reused to thin out your puree.)
 Step 3: Do the fork test to see if their done. If it easily breaks apart with the fork, they're ready for pureeing!
 Step 4: After letting the veggies cool for a while (I prefer almost room temperature so no steam builds up in the blender), puree as much as the veggies as your blender can handle. If you need to add water and you probably will, remember to use the water you boiled your veggies in. Don't let those nutrients go to waste!
 Step 5: Scoop your puree into your muffin tins. I used 1/4 cup when munchkin was really little, now I use 1/3 cup. Put them in the freezer until solid.
 Step 6: Before you pull your muffin tins out of the freezer (or if you're using metal tins, take them out now to defrost just a little so you can get your pellets out). Cut out squares of wax paper roughly the size of your pellets, so the pellets don't touch when stacked.
 Step 7: This is where having the silicone tins is great, you can pop the pellets right out rather than trying to ease them out of a rigid metal tin.
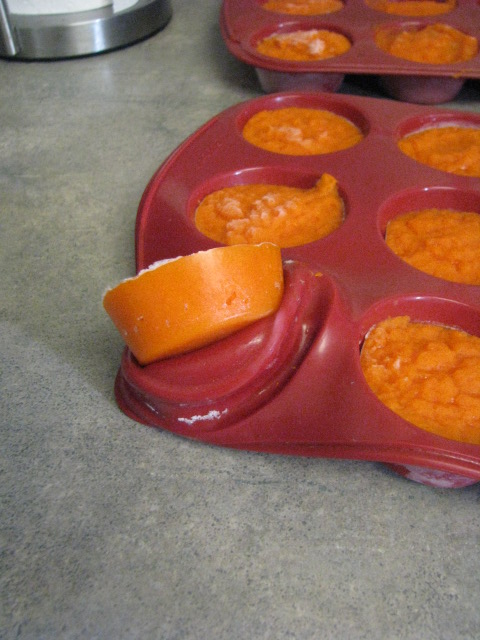 Step 8: Put your pellets on the squares. Aren't they cute?
 Step 9: This is the only step that takes a little practice, stacking your pellets. It helps to tip the bag diagonally, like so:
 Stack the rows tightly to keep them from sliding around in the freezer. I did seven with the 1/3 cup pellets, you might get 8 out of the 1/4 cup portions. I don't remember. Now you're done, stick it in the freezer and pull out pellets as needed!
P.S. This cost me roughly $2.50 for more than 24 portions (some of the puree ended up in the fridge) of organic baby food. Yay frugality!
No comments:
Post a Comment